Red Velvet Cake with Rich and Creamy Cheesecake Layer
If you're looking for a show-stopping dessert that tastes just as incredible as it looks, this Red Velvet Cheesecake Cake is the recipe to make. Layers of soft homemade red velvet cake surround a rich and creamy cheesecake center, all finished with smooth cream cheese frosting and optional white chocolate shavings for the ultimate bakery-style dessert.
This cake may look complicated, but the process is actually very simple when broken down step by step. It's the perfect make-ahead dessert for birthdays, holidays, Valentine's Day, Christmas gatherings, or any special occasion where you want to impress your guests.
The cheesecake layer is smooth, creamy, and perfectly balanced with the soft red velvet cake and tangy cream cheese frosting. Every bite combines the classic flavors of red velvet cake and cheesecake into one incredibly indulgent dessert.
Why You'll Love This Red Velvet Cheesecake Cake
Rich, creamy, and completely decadent
Soft and flavorful homemade red velvet cake
Smooth, creamy cheesecake center
Tangy cream cheese frosting
Perfect make-ahead dessert
Bakery-style cake made right at home
Perfect for birthdays, holidays, and celebrations
Easier to make than it looks
Beautiful with white chocolate shavings or your favorite decorations
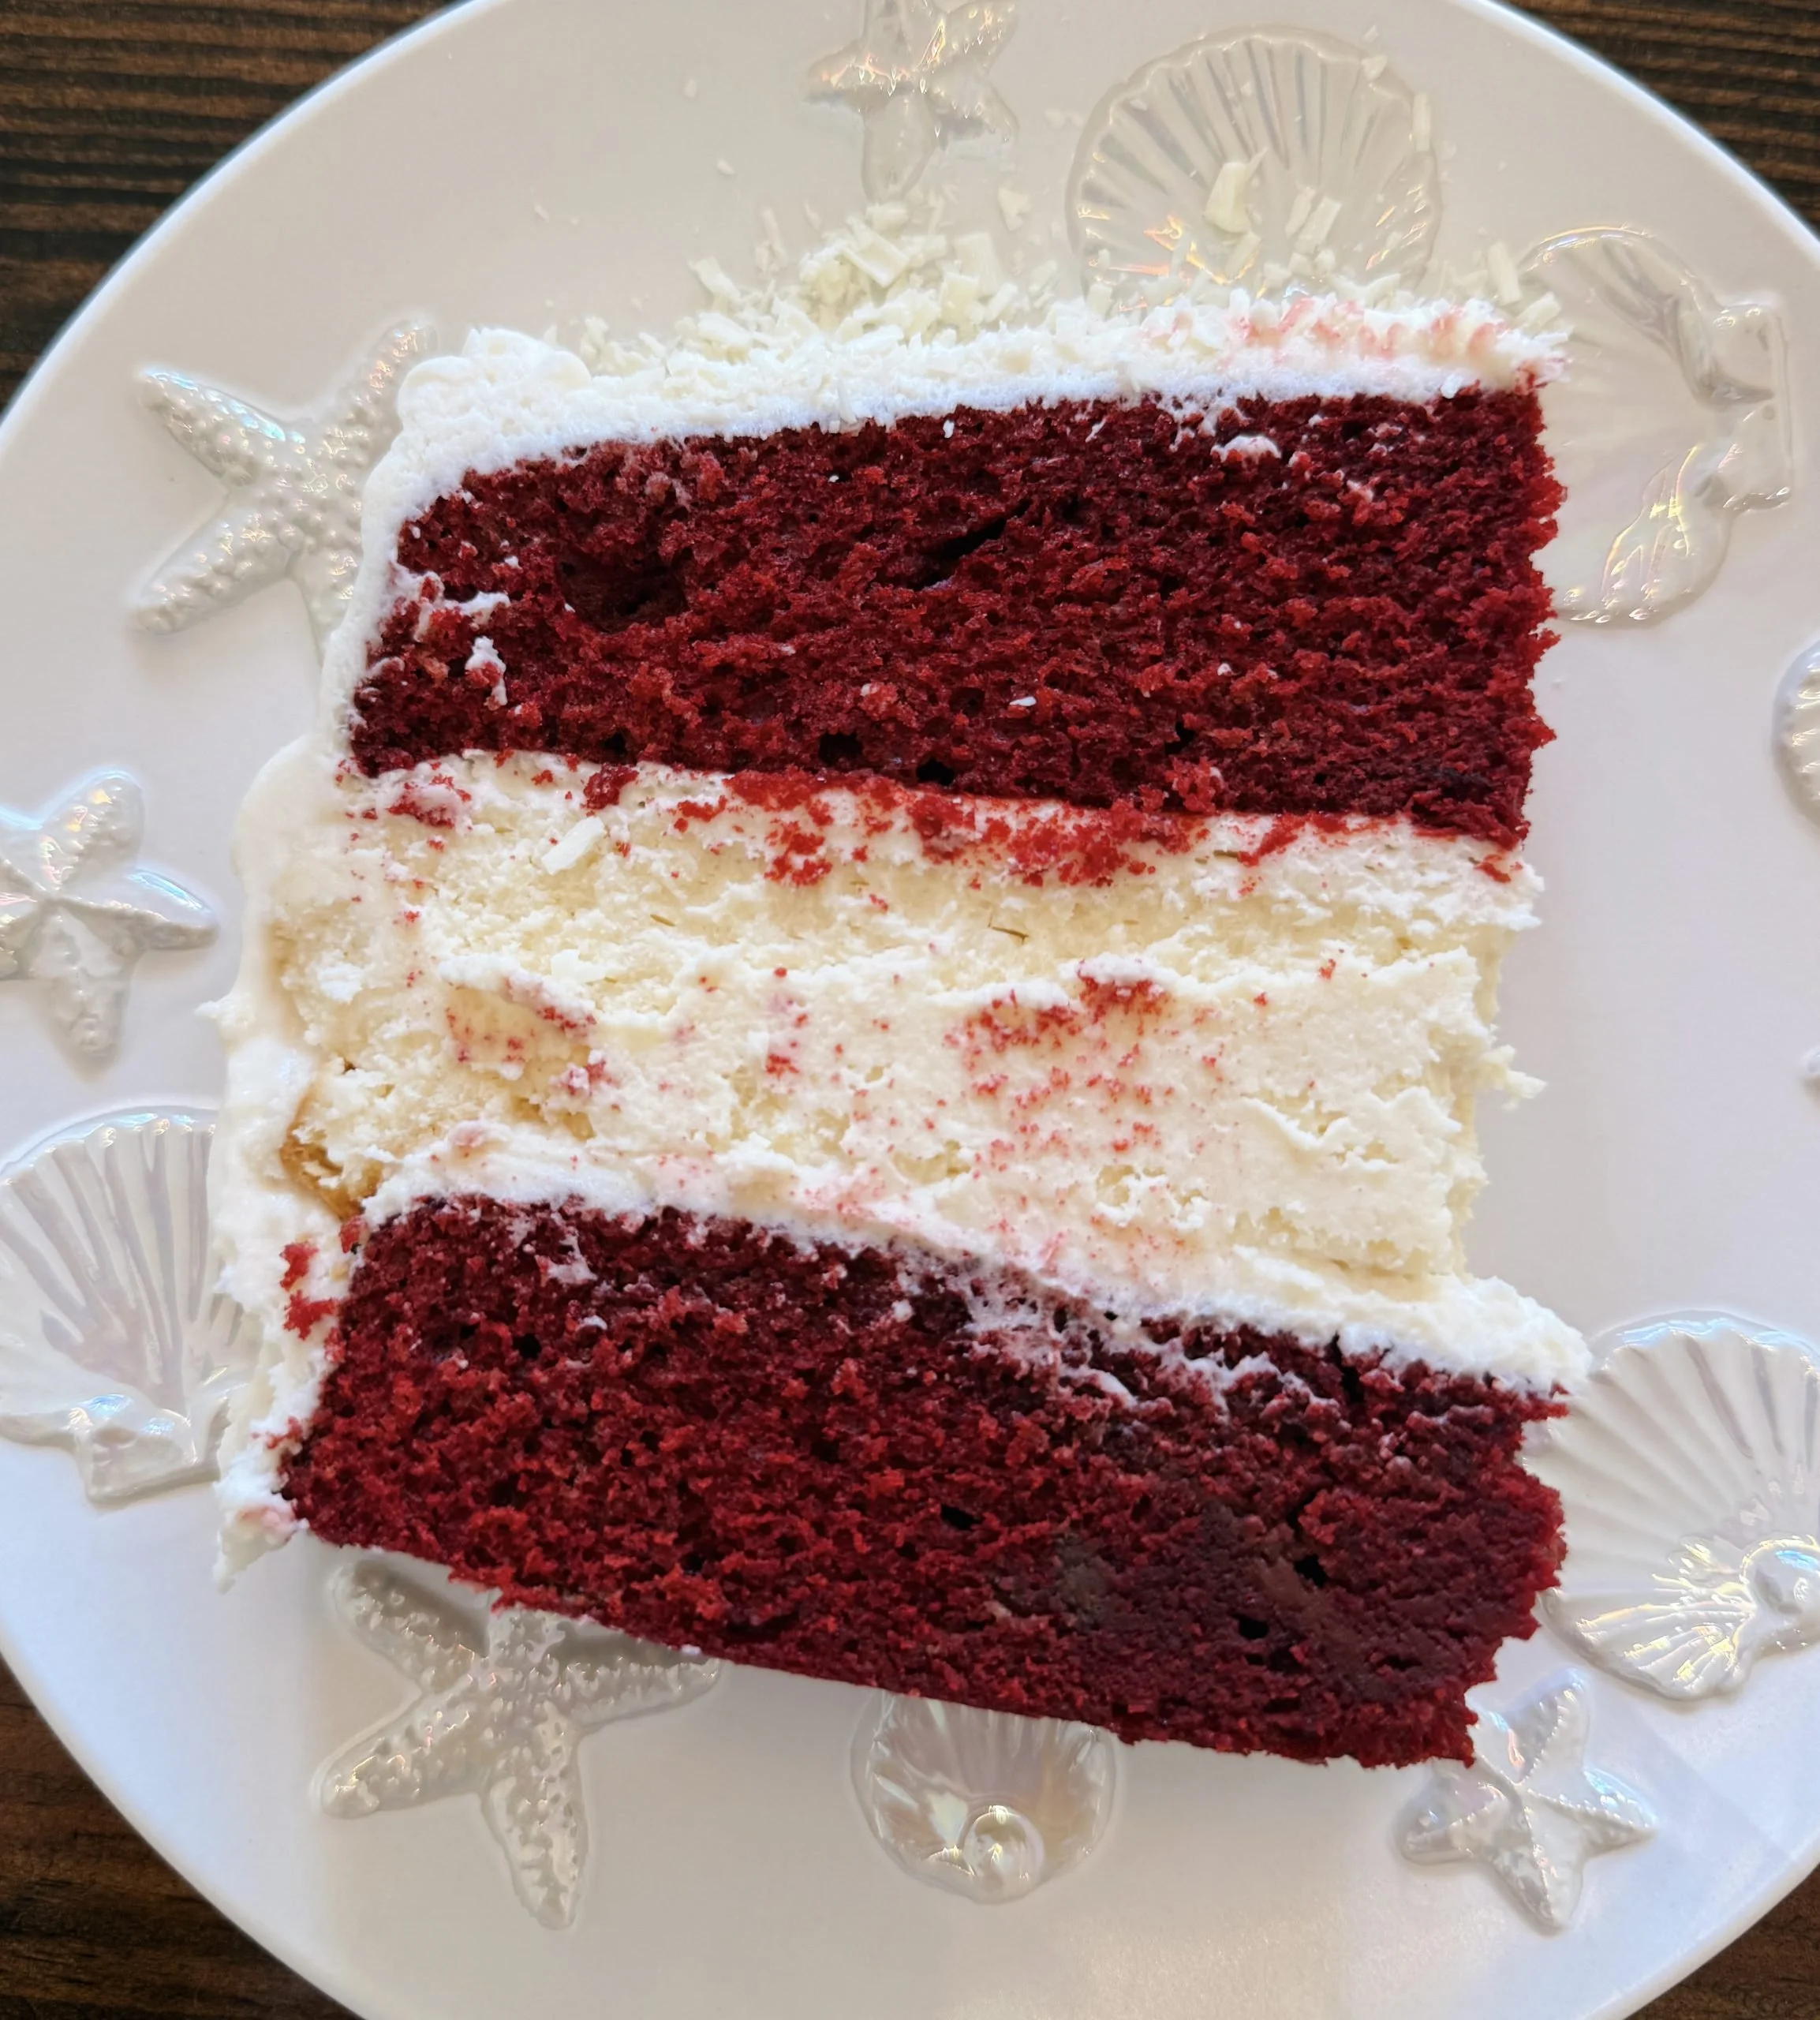
Red Velvet Cheesecake Cake
This Red Velvet Cheesecake Cake features layers of soft homemade red velvet cake, a creamy cheesecake center, and smooth cream cheese frosting for an impressive bakery-style dessert that's perfect for birthdays, holidays, and special occasions.
Recipe Details
Category: Dessert, Cake
Cuisine: American
Prep Time: 30 minutes
Cook Time: About 1 hour 30 minutes
Chill Time: At least 4 hours
Total Time: About 6 hours
Servings: 12–16 slices
Ingredients
For the Cheesecake Layer
24 ounces cream cheese, softened to room temperature
1 cup granulated sugar
2 tablespoons all-purpose flour
Pinch of salt
2 teaspoons vanilla extract
1/2 cup sour cream, room temperature
1/2 cup heavy cream, room temperature
3 large eggs, room temperature
For the Red Velvet Cake Layers
2 1/2 cups all-purpose flour
1 1/2 cups granulated sugar
1 1/2 teaspoons baking soda
1 teaspoon salt
3 tablespoons cocoa powder
2 teaspoons vanilla extract
2 teaspoons distilled white vinegar
1 1/2 cups vegetable oil
1 cup buttermilk, room temperature
2 large eggs, room temperature
1 ounce red food coloring
For the Cream Cheese Frosting
16 ounces cream cheese, softened to room temperature
1/2 cup salted butter, softened to room temperature
2 teaspoons vanilla extract
2 tablespoons heavy cream
5 cups powdered sugar
Optional Topping
White chocolate shavings
How to Make Red Velvet Cheesecake Cake
1. Prepare the Cheesecake Layer
Place a 13x9-inch baking pan on the lower oven rack and fill it halfway with water. This creates steam in the oven and helps reduce the chance of cracks in the cheesecake.
Place another oven rack directly above the water pan.
Preheat the oven to 300°F.
Spray a 9-inch springform pan with nonstick cooking spray.
In a large mixing bowl, beat the cream cheese, sugar, flour, and salt on low speed until smooth and creamy. Avoid overmixing, which can incorporate too much air into the batter.
Scrape down the sides of the bowl.
Add the sour cream, heavy cream, and vanilla extract. Mix on low speed until combined.
Add the eggs one at a time, mixing slowly after each addition just until incorporated.
Pour the cheesecake batter into the prepared springform pan.
Place the cheesecake on the oven rack above the water pan and bake for 1 hour.
Once the hour is complete, turn off the oven and leave the cheesecake inside with the door closed for 30 minutes.
After 30 minutes, crack the oven door slightly and allow the cheesecake to remain in the oven for another 30 minutes.
Remove the cheesecake from the oven and allow it to cool at room temperature for 1 hour.
If desired, carefully trim the edges of the cheesecake for a smoother appearance.
Cover the cheesecake with foil and place it in the freezer for at least 4 hours or overnight, until completely frozen.
2. Make the Red Velvet Cake Layers
Preheat the oven to 350°F.
Grease two 9-inch round cake pans with nonstick baking spray.
In a large mixing bowl, combine the flour, sugar, baking soda, salt, and cocoa powder.
Add the vanilla extract and distilled white vinegar and mix to combine.
Add the vegetable oil and mix until incorporated.
Slowly add the buttermilk and mix until combined.
Add the eggs one at a time, mixing after each addition until incorporated.
Add the red food coloring and mix until the batter is evenly colored.
Divide the batter evenly between the prepared cake pans.
Bake for 30–32 minutes, or until a toothpick inserted into the center comes out clean.
Allow the cakes to cool in the pans for about 10 minutes, then transfer them to a wire rack to cool completely.
3. Make the Cream Cheese Frosting
In a large mixing bowl, beat the cream cheese and softened butter on medium-high speed until smooth and creamy.
Add the heavy cream and vanilla extract and mix until combined.
Scrape down the sides of the bowl.
Gradually add the powdered sugar, about 1 cup at a time, mixing on low speed between additions.
Once all of the powdered sugar has been incorporated, increase the speed to medium-high and beat until the frosting is smooth and fluffy.
4. Assemble the Cake
Place one red velvet cake layer on a cake plate or cake stand.
Spread a layer of cream cheese frosting evenly over the top.
Remove the frozen cheesecake from the freezer and carefully loosen it from the springform pan. If needed, run a knife around the edge to help release it.
Carefully place the cheesecake layer on top of the frosted red velvet cake layer.
Spread another layer of cream cheese frosting over the cheesecake.
Place the second red velvet cake layer on top.
5. Frost the Cake
Apply a thin layer of cream cheese frosting around the entire cake. This is your crumb coat, which helps keep red velvet crumbs from mixing into the final layer of frosting.
Refrigerate the cake for 30 minutes to allow the crumb coat to set.
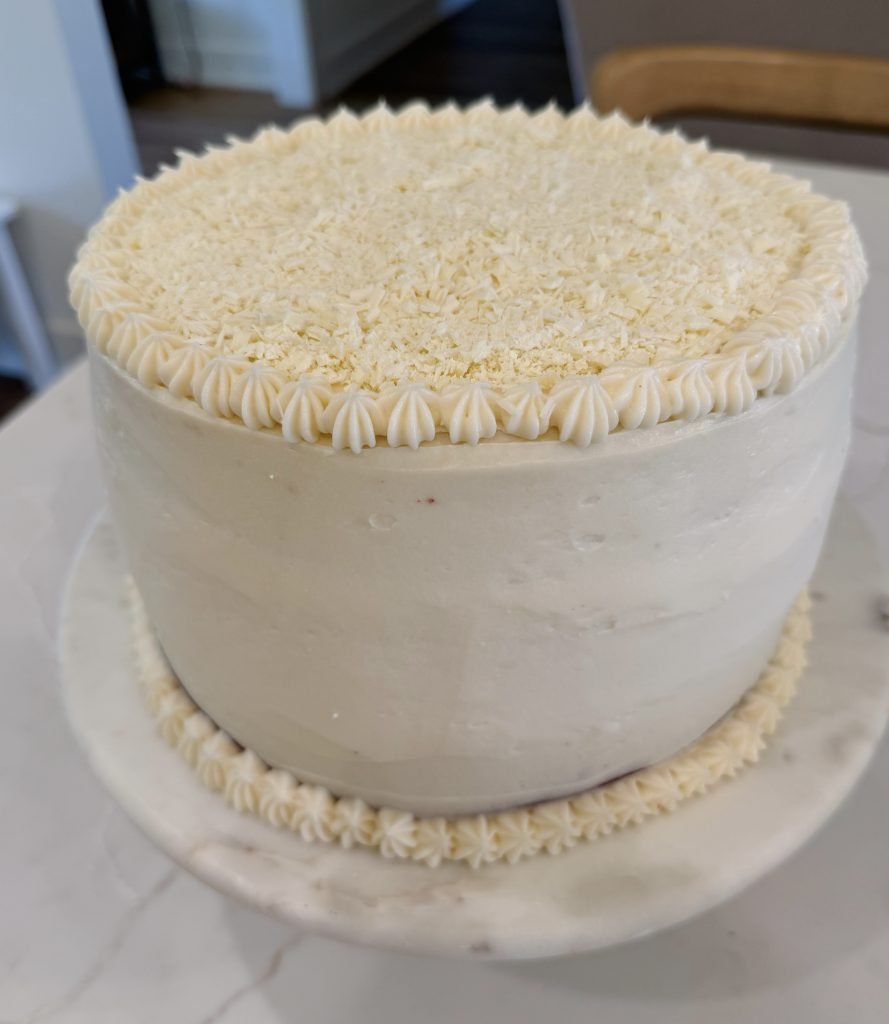
Once chilled, frost the top and sides of the cake evenly with the remaining cream cheese frosting.
Decorate with white chocolate shavings or your favorite toppings, if desired.
Tips for the Best Red Velvet Cheesecake Cake
Use room-temperature ingredients. This helps create smooth, evenly mixed cheesecake batter and frosting.
Don't overmix the cheesecake batter. Mixing too much air into the batter can contribute to cracks.
Don't skip the slow cooling process. Allowing the cheesecake to cool gradually helps minimize cracking.
Freeze the cheesecake before assembling. A frozen cheesecake layer is much easier to handle and stack.
Make sure the cake layers are completely cool. Warm cake can cause the cream cheese frosting to soften and slide.
Use a crumb coat. This creates a cleaner, more polished finish on the finished cake.
Chill before serving. The cake slices more cleanly and the flavors come together beautifully after chilling.
Make-Ahead Instructions
This Red Velvet Cheesecake Cake is an excellent make-ahead dessert.
The cheesecake layer can be prepared 1–2 days ahead of time and kept frozen.
The red velvet cake layers can be baked ahead of time and frozen.
Wrap cooled cake layers tightly in plastic wrap and then foil before freezing.
Thaw frozen cake layers in the refrigerator for at least 1 hour before assembling.
The fully assembled cake can also be made a day ahead and stored in the refrigerator until ready to serve.
Serving Suggestions
For the cleanest slices, keep the cake chilled until you're ready to serve. Use a sharp knife and wipe the blade clean between slices.
Top the cake with white chocolate shavings, red velvet cake crumbs, or a few simple swirls of cream cheese frosting for an elegant finish.
This cake is especially beautiful served for birthdays, Christmas, Valentine's Day, Mother's Day, or other special celebrations.
Storage
Store the assembled cake covered in the refrigerator for up to 5 days.
For the best texture and flavor, allow individual slices to sit at room temperature for about 15–30 minutes before serving.
Can I make this cake ahead of time?
Yes! This is an excellent make-ahead dessert. The cheesecake and red velvet cake layers can both be prepared in advance, making the final assembly much easier.
Why do I freeze the cheesecake layer?
Freezing the cheesecake makes it firm enough to handle and stack without breaking. It also makes assembling the layers much easier and helps prevent the cheesecake from squeezing out when the cake is frosted.
Do I have to use a traditional water bath?
No. This recipe uses a separate pan of water on the lower oven rack rather than placing the springform pan directly into a water bath. The steam helps create a moist oven environment and can reduce the chance of the cheesecake cracking.
How do I keep the cheesecake from cracking?
Avoid overmixing the batter, bake the cheesecake gently, and follow the slow cooling process. Even if a small crack forms, don't worry—the cream cheese frosting will cover it when you assemble the cake.
Can I decorate the cake without white chocolate?
Absolutely. White chocolate shavings are completely optional. You can decorate the cake with red velvet cake crumbs, piped cream cheese frosting, sprinkles, or simply leave it with a smooth frosting finish.
Final Thoughts
This Red Velvet Cheesecake Cake is rich, creamy, impressive, and absolutely unforgettable. The combination of soft red velvet cake, silky cheesecake, and tangy cream cheese frosting creates a dessert that feels bakery-quality while still being completely achievable at home.
It does take a little time to prepare, but breaking the recipe into separate steps makes the process much easier. Make the cheesecake and cake layers ahead of time, assemble everything once they're ready, and you'll have a stunning dessert that's perfect for any special occasion.